No electricity. No scales. No mixer. Just years of tradition. (I do have a question about 20 g of salt…) Simple. Delicious. Try it!
Blog
-
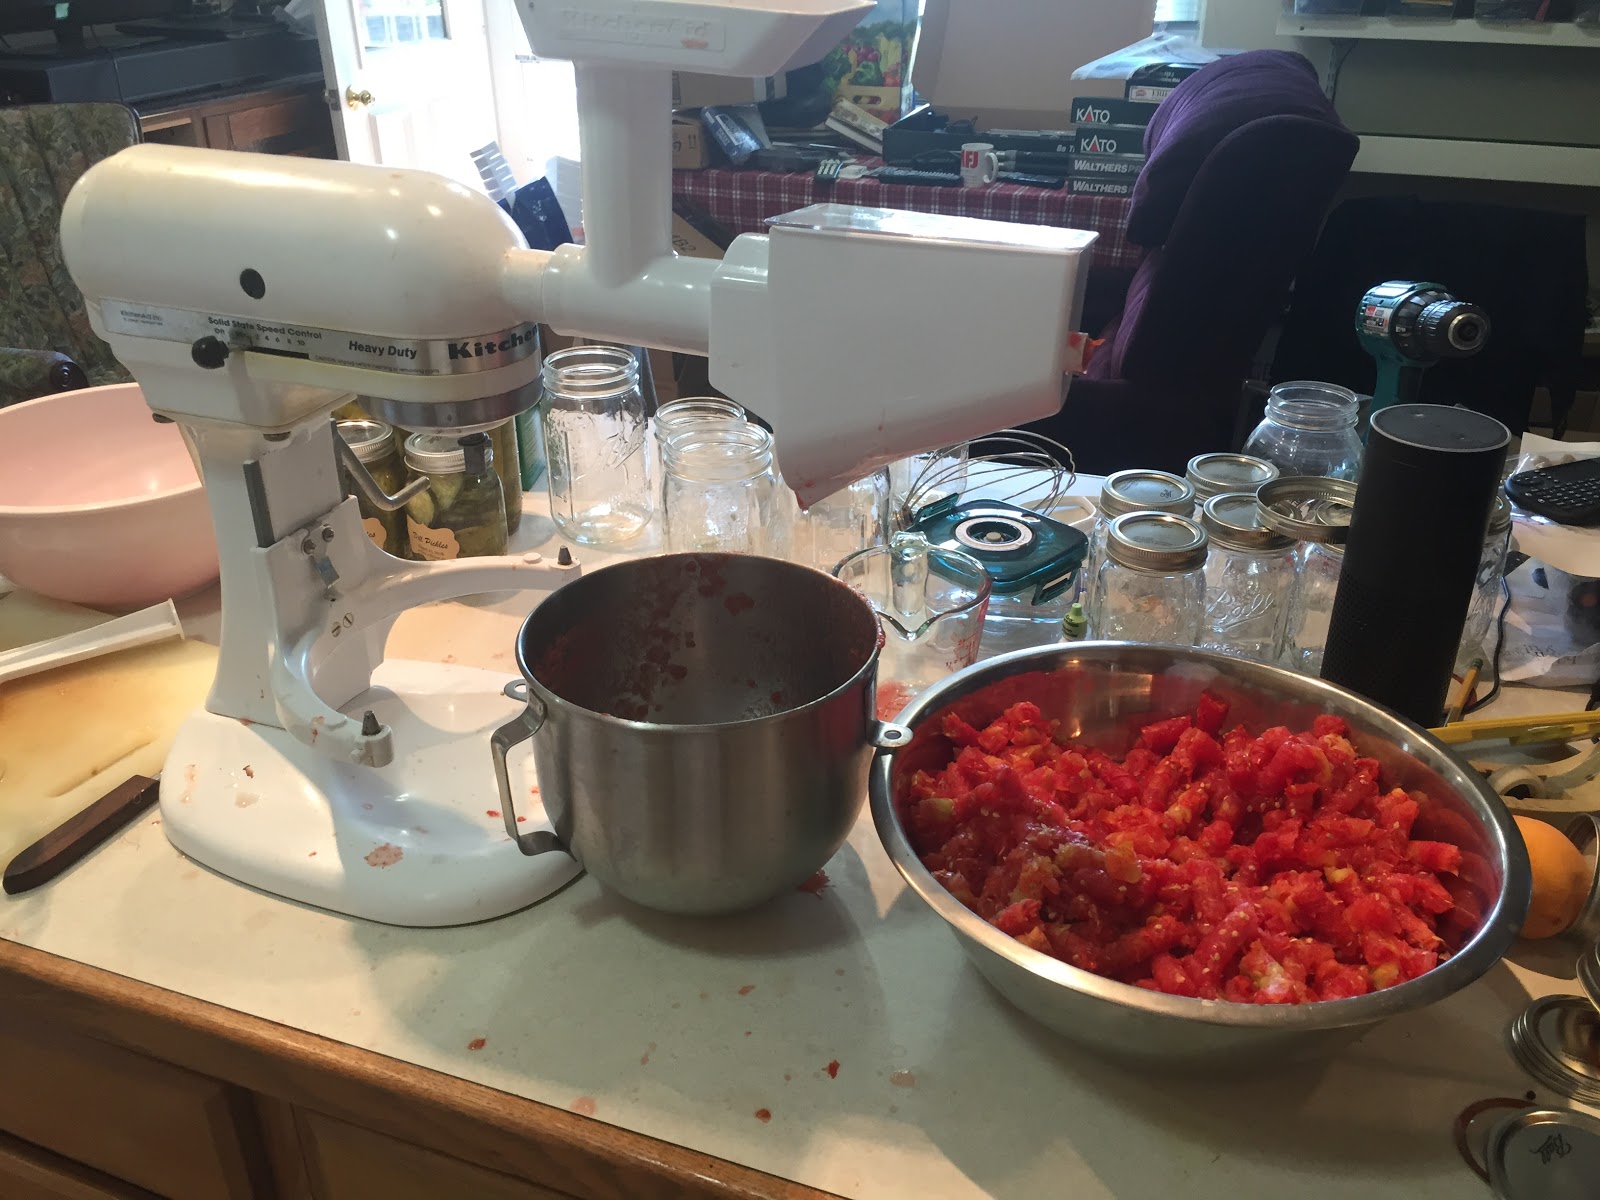
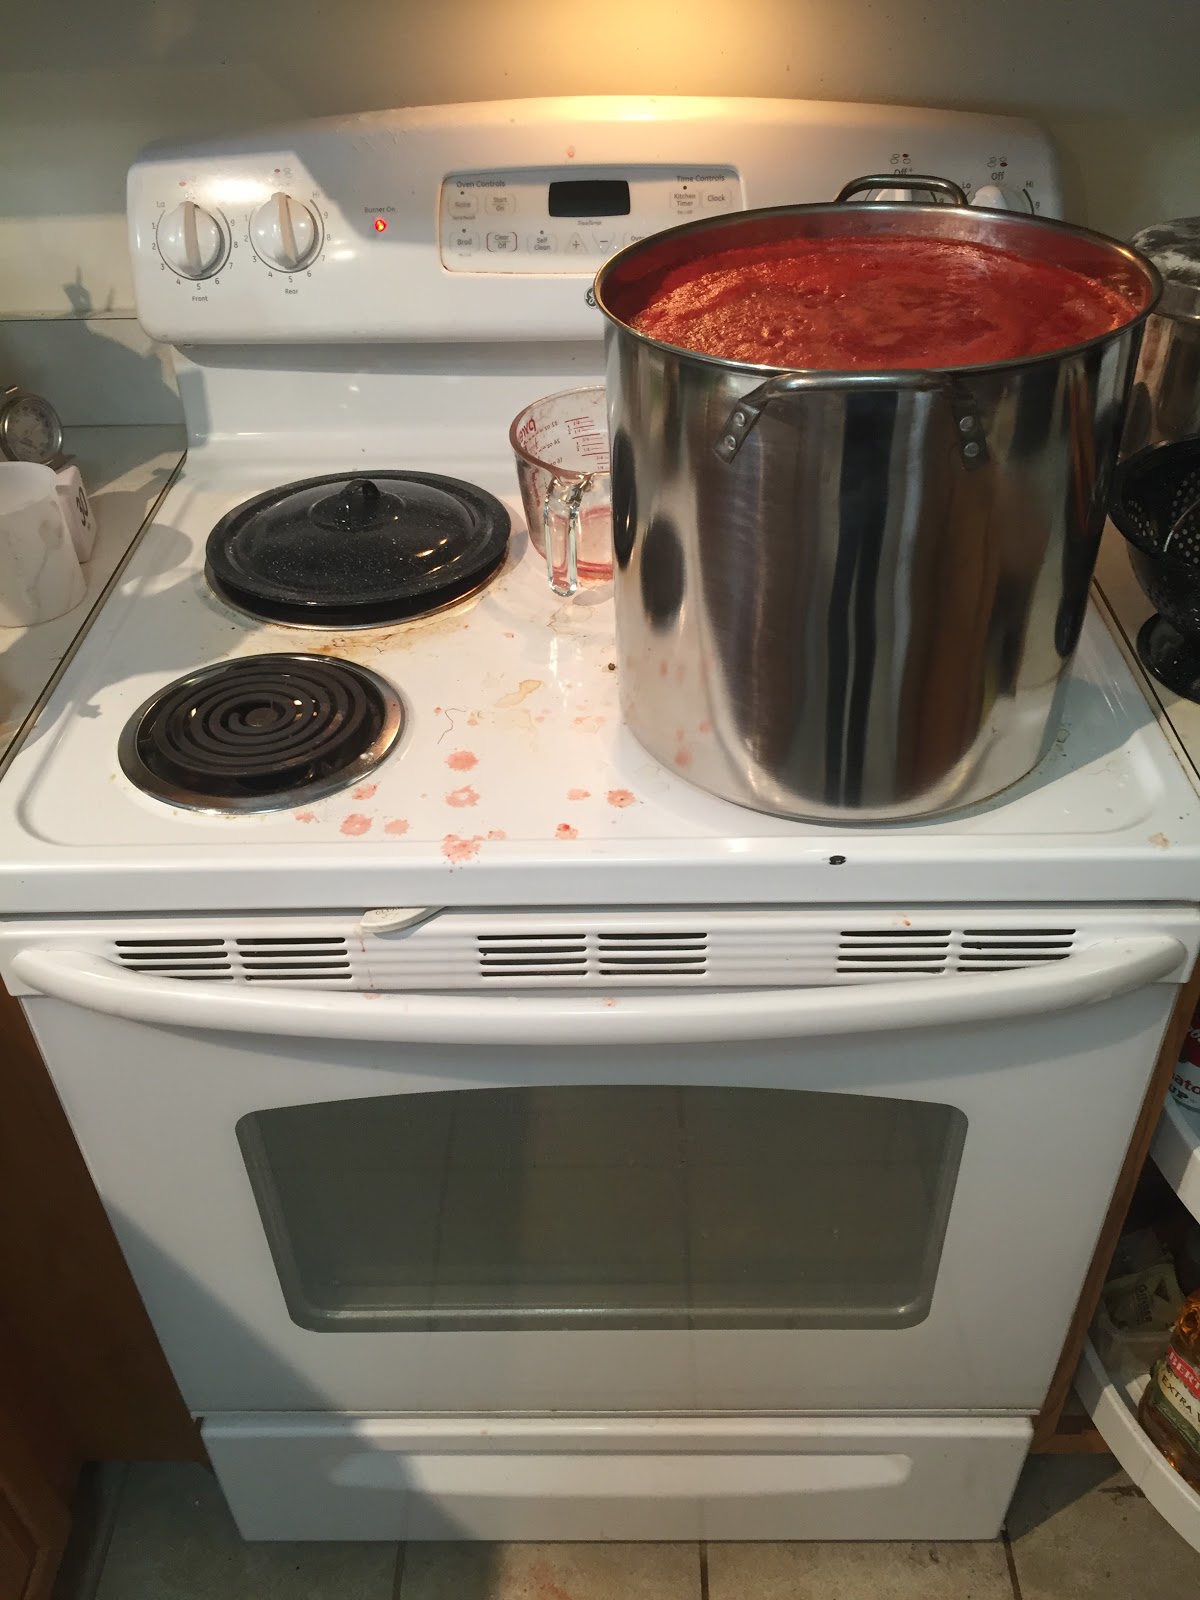
Canning Tomatoes
 Just finished making some sauce out of a bushel of tomatoes. Boy, what a mess. The full pot on the stove ultimately reduced to a half pot. From beginning to end, the whole process took about 6 hours. Two hours for separating the seeds and skins, and another four hours to boil it down to the right consistency.I’ll be making another web site when I get time to keep track of my canning adventures. Stay tuned!
-
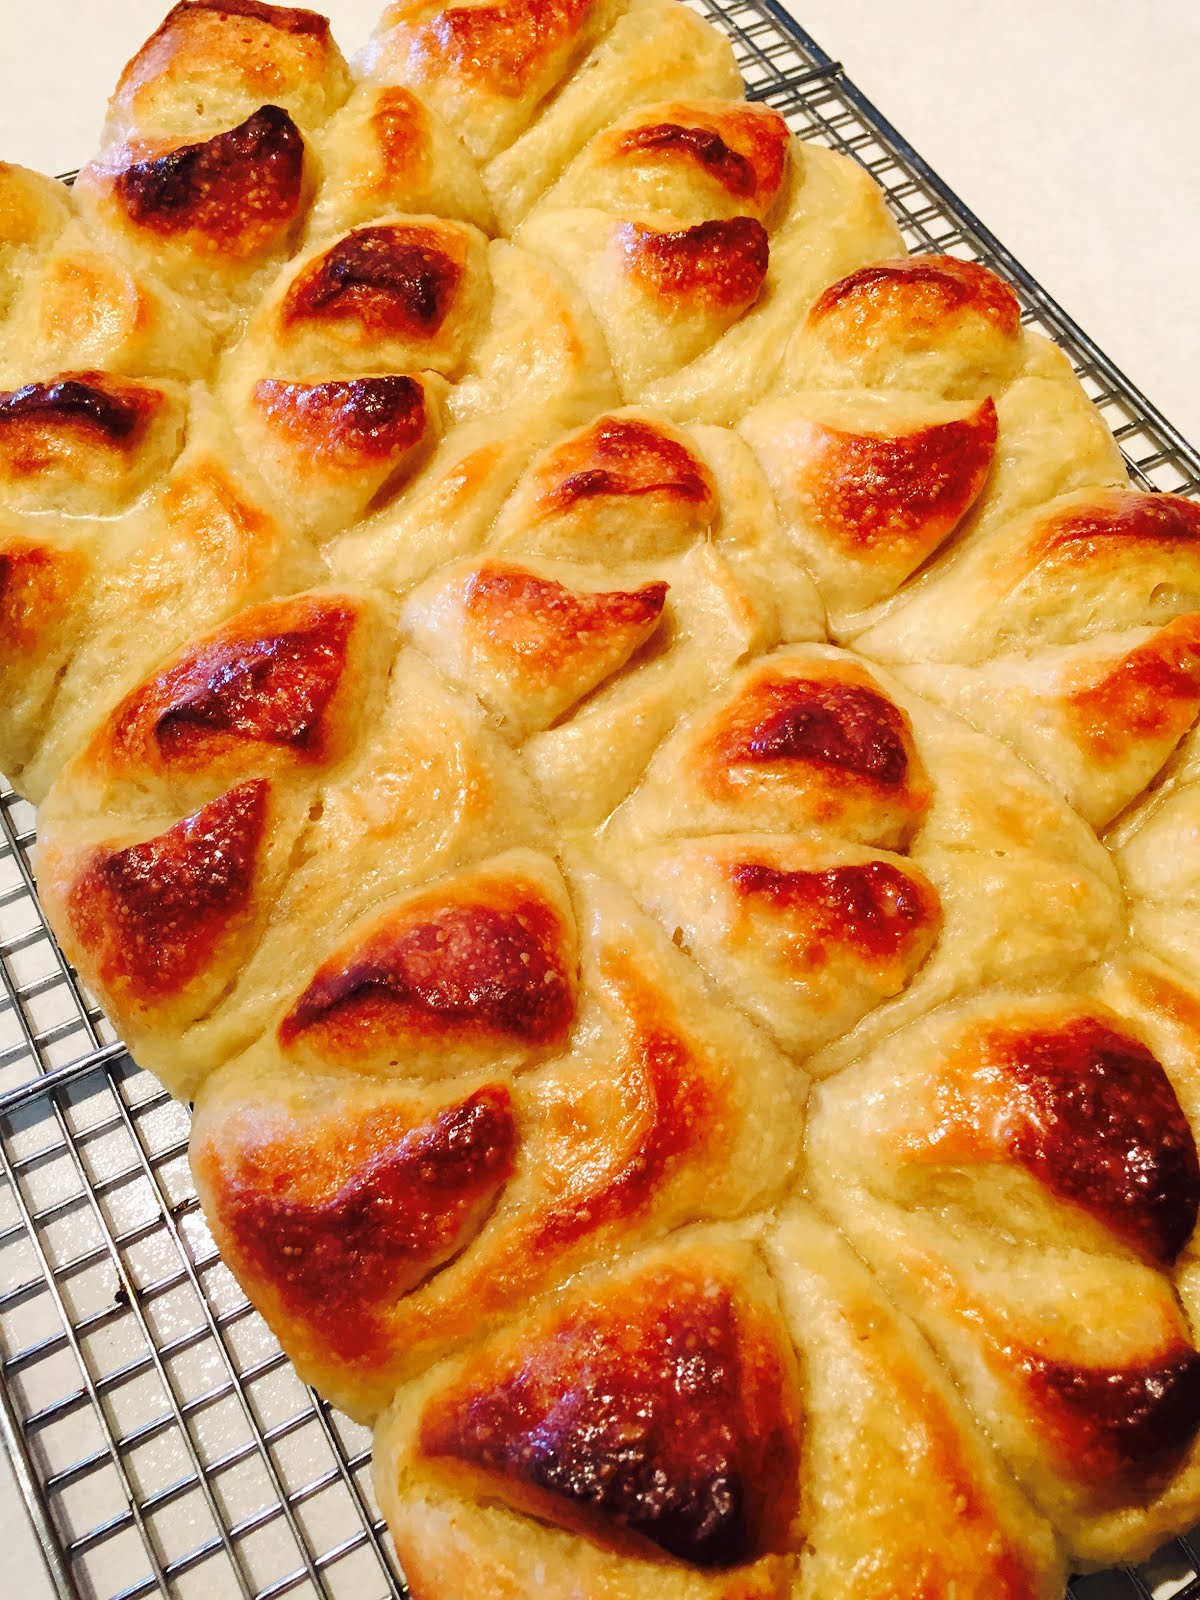
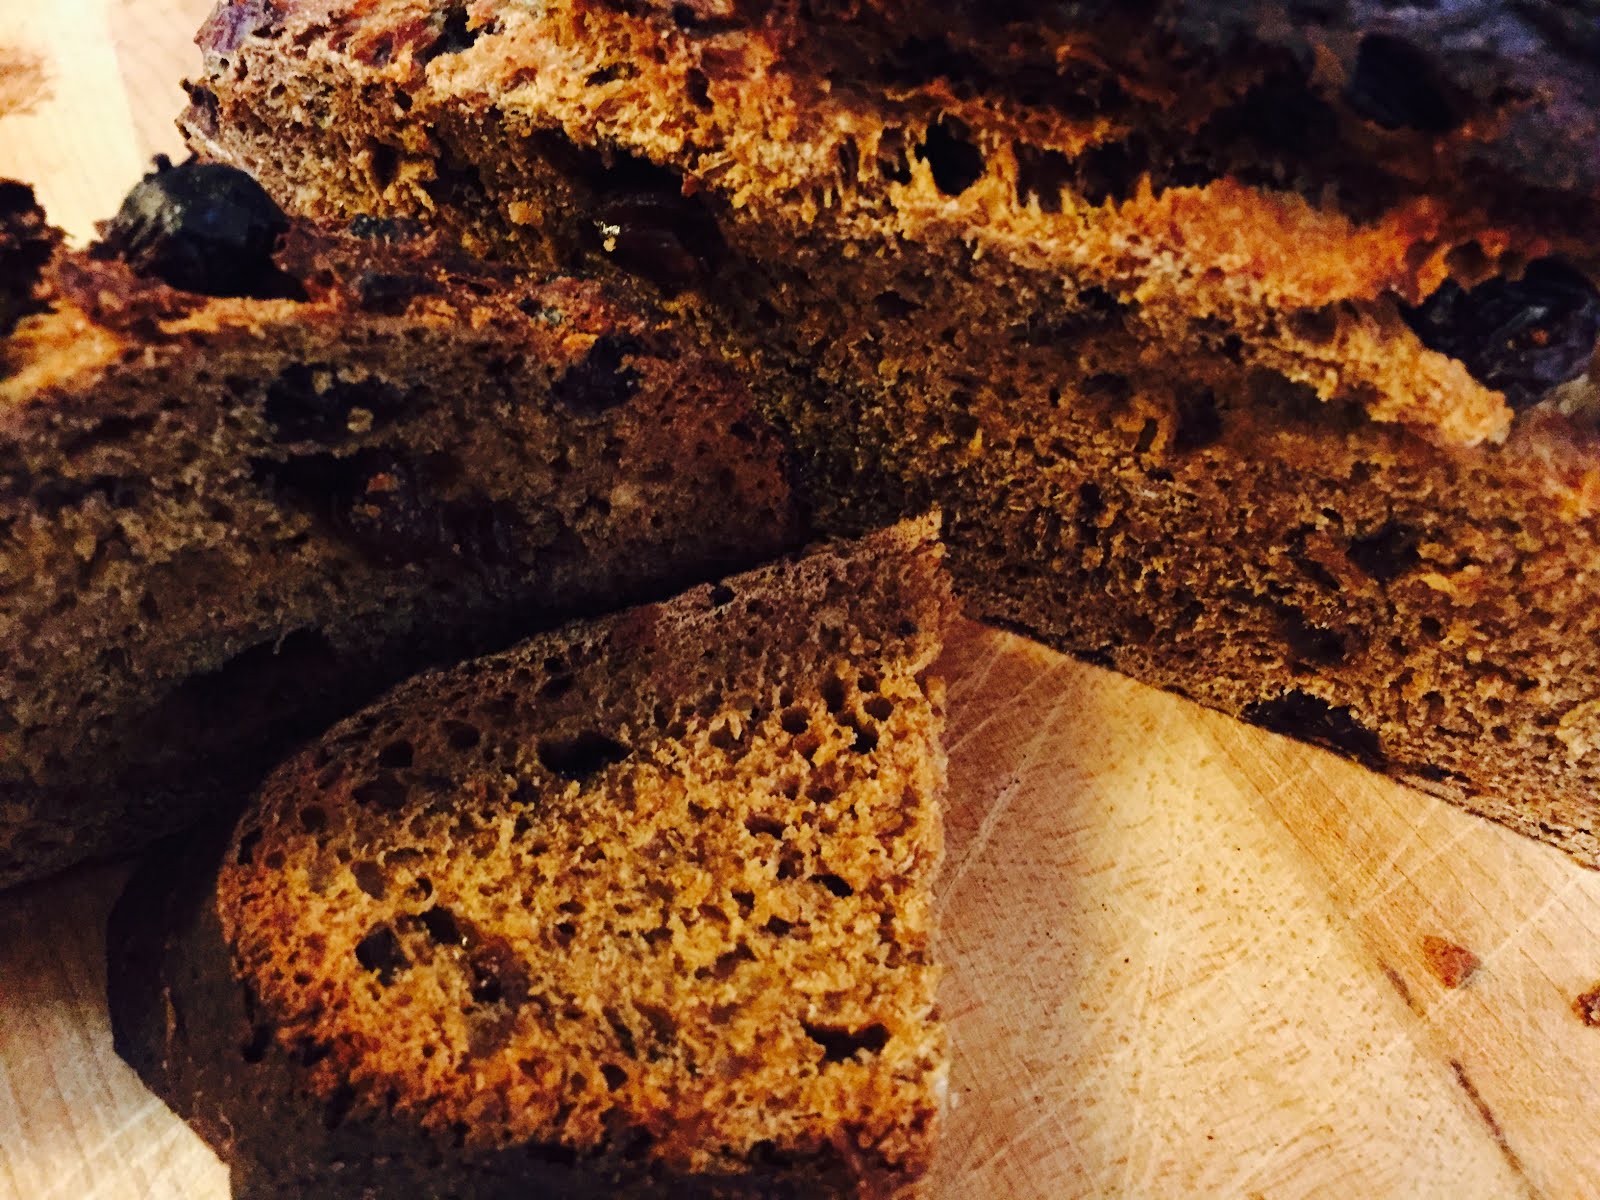
Pumpernickel Just in Time
 for the holidays!
 -
And a Sourdough Bread Sandwich!
You’re supposed to wait for the bread to completely cool before eating. Yeah, sure. That works… This was a damn good sandwich.
So was the next one…

-
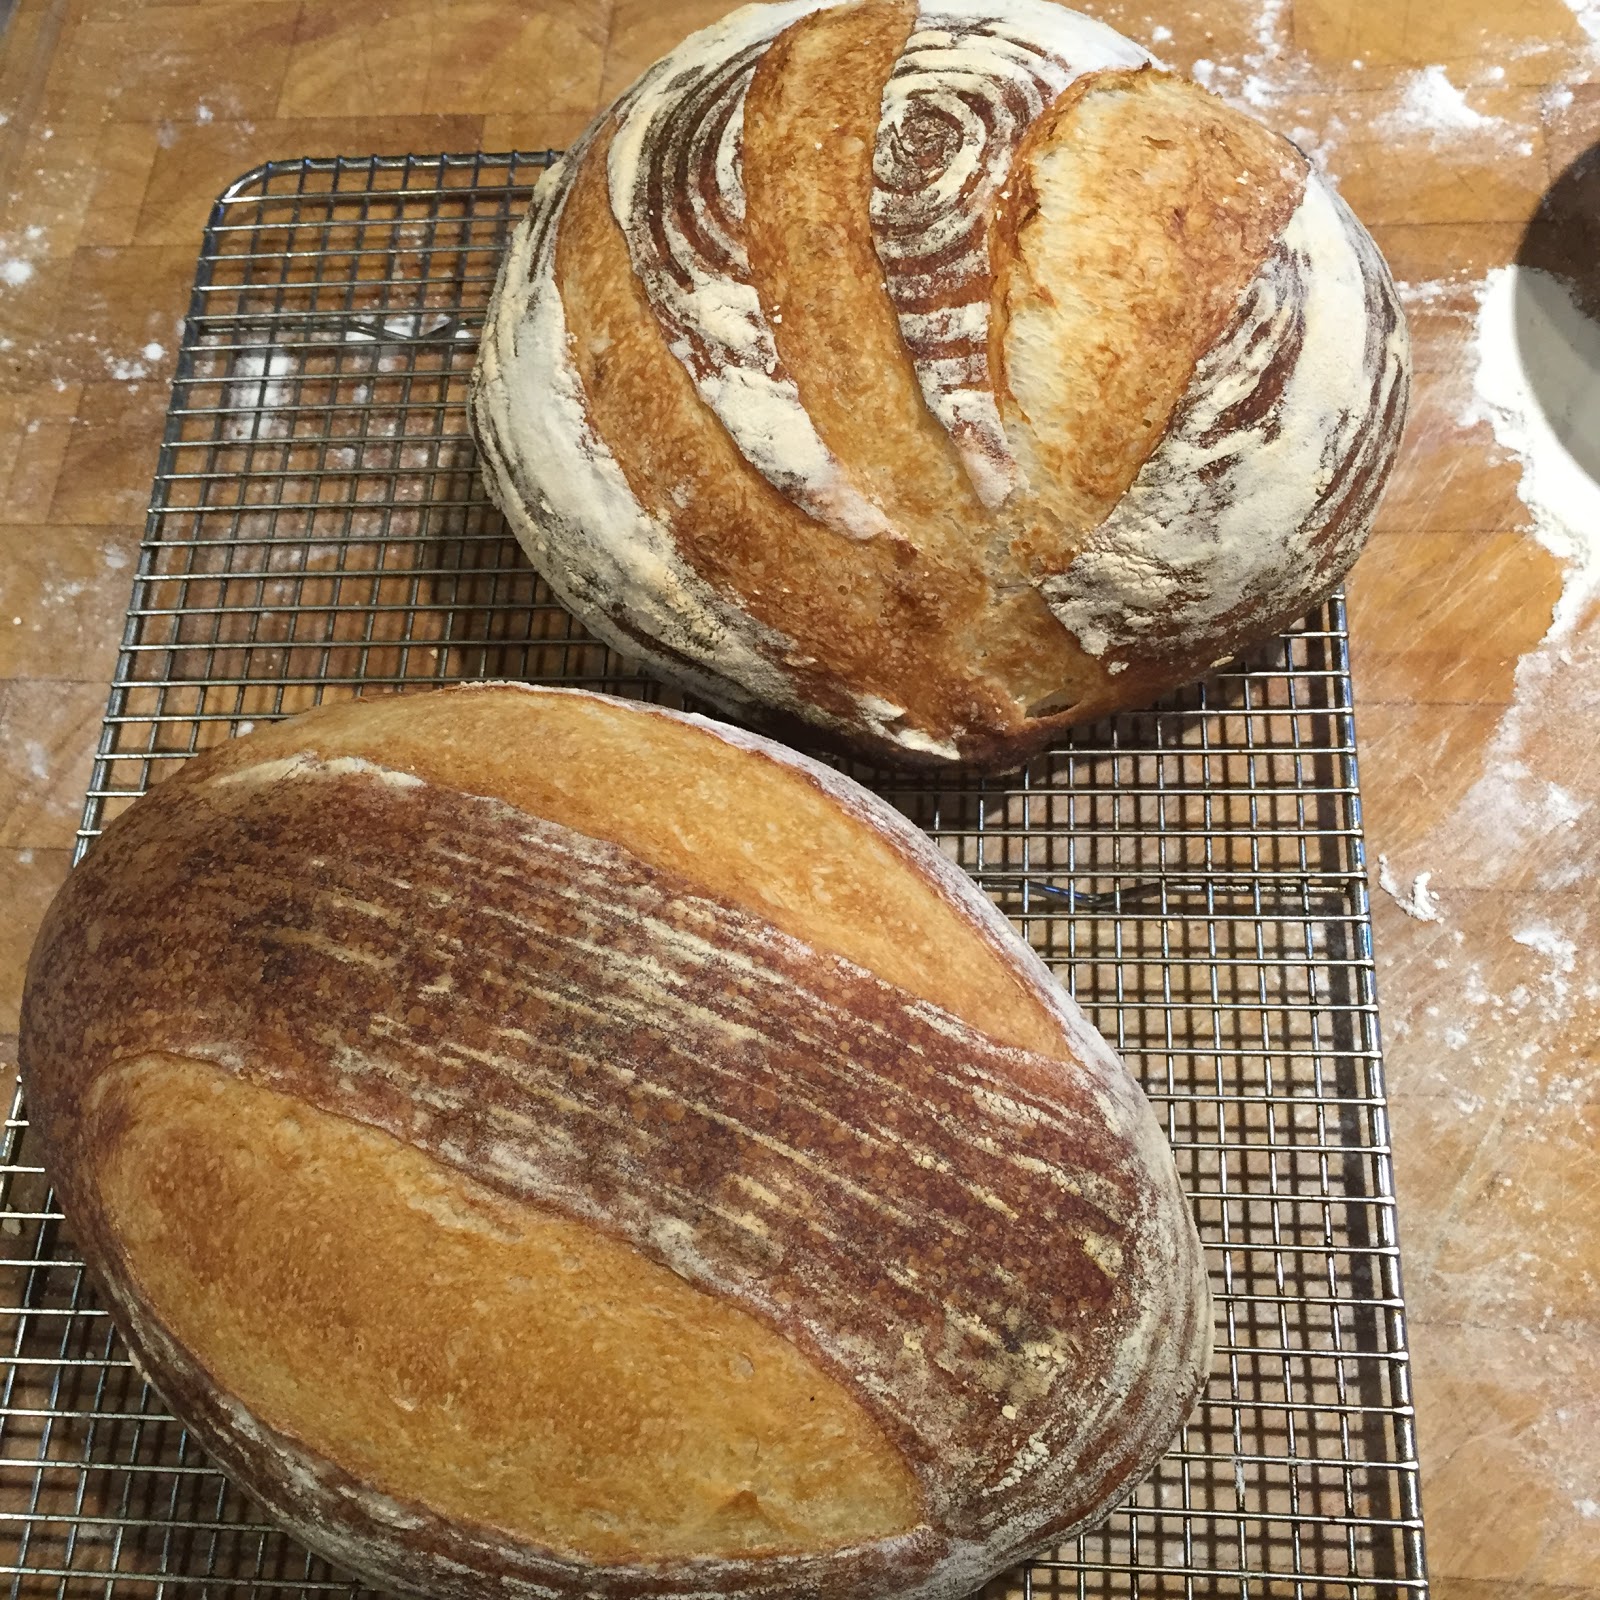
Sourdough Loaves
A couple of weeks ago I signed up for a Sourdough Bread class taught by Richard Miscovich with Craftsy. His technique is very similar to other bakers that I follow. I needed a refresher, the course was on sale, and in my view, it’s about the same price as a decent book. By the way, if you sign up for a Craftsy course, the content doesn’t expire. So, you can watch it over again as often as you please. The instructors also respond to your questions. It’s a pretty good program.

Two Loaves of Sourdough Bread So, I’ve been nurturing this sourdough starter for a few weeks, and yesterday I determined that it was about ready. Today I baked two loaves and I’m pleased with the result. The loaf at the top of the picture was baked at 450 for about 30 minutes, the first 20 minutes under a preheated inverted dutch oven on a baking stone. The dutch oven helps maintain a moist environment. The bottom loaf was baked open at 450 for 20 minutes, temperature reduced to 350 for another 10.
Both loaves went through their final rise in bannetons.
One important lesson I’ve learned is the value of the twenty minute autolyse before the salt is added.
There are YouTube videos on how this process works also, not to mention a slew of bread books.
-
Large Cranberry Orange Muffins

This morning, I baked these muffins for my wife to take to work. This is my third attempt in as many weeks. I’m finally quite happy with them. Here is the recipe…
Ingredients:
- 2 cups all purpose flour
- 3/4 cup sugar
- 1 tsp baking powder
- 1/2 tsp baking soda
- 1/2 tsp salt
- 1 cup Ocean Spray Craisins
- 1 tbsp flax seed (or egg replacer)
- 3/4 cup fresh orange juice
- 1/4 cup vegetable oil
- 1 tsp orange zest
Directions:
- Combine the dry ingredients
- Stir in Craisins
- Grind the flax seed to a powder and whip with about the same amount of water until it looks like whipped egg.
- Whisk the flax seed “egg” (or egg replacer) together with oil, zest, and fresh orange juice.
- Stir wet ingredients into dry until just moistened. Add water as necessary to make batter just barely able to fall off a large spoon.
- Spoon into greased muffin cups (3 1/2 inches at the top)
- Sprinkle tops with cane sugar
- Makes 6 large muffins
- Bake in preheated moderately hot (375 degrees F) oven for 30 min or till tooth pick comes out clean and tops are golden brown
- Cool for 10 minutes before gently removing to platter
- Serve warm or cool
Tips: If you’re using a smaller muffin tin, bake at 400 for 20 minutes. Don’t try to remove muffins from tin right out of the oven; they’re not firm enough.Also, I baked a second batch that included chocolate chips. They were also good, but I prefer them without. You could also add chopped walnuts. I haven’t tried that. -
Loaves For Nurses

I baked these loaves this morning for the nursing staff here at Heritage Village. Using a kilogram of flour at 68% hydration, fermented over night, and divided more or less equally, I loaded them into Art’s over at 500° F, and immediately reduced to 450° for about 20-25 minutes. They were at 205° on exit, so I think next time, my final oven temperature will be 475° so that the inside temperature will be closer to the 200° target internal temperature by the time the outside gets to be the right color.
-
Sunday Burger Rolls
Once again, I’ve changed up the formulation for these rolls. Here’s the rundown:

Burger Rolls - 1000 grams flour
- 500 grams of Almond Milk
- 100 grams of water
- 100 grams of olive oil
- Teaspoon of Instant Yeast (also known as bread machine yeast)
- 22 grams of sea salt
Combine dry ingredients first. And wet ingredients separately. For faster rise times, heat wet ingredients in the microwave for a minute or so until warm (not hot!)Using a hand mixer with dough hooks, knead well – about 5 minutes.Let rise until double in size (at least)Scale portions to 143.5 grams each (more or less – if my math is correct, that should make 12 rolls for a 3×4 matrix on the sheet pan).Form into balls and let rest for about ten minutes.Form with fingers into disks about 3 1/2 to 4 inches in diameter with a depressed center. Three of these should fit across a half sheet pan and just barely touch.Bake at 390° F for 20 minutes or until golden brown (inside temperature should be at least 190. 200 is better. Remove and brush with Earth Balance. Cool on a rack. Slice and store in zip lock bag for up to two days. Freeze for longer periods.Comment One: These are unquestionably the best rolls I’ve made to date. The same formulation could be used for dinner rolls, and/or hoagie, and/or hot dog rolls. Sesame or poppy seeds could be added prior to baking.Comment Two: These are the best rolls I’ve had from anywhere!